


That silky, glossy microfoam you get at your favorite café doesn't happen by accident. It's the result of the right technique — and the right pitcher. If you've ever tried steaming milk at home and ended up with a flat, watery texture or a pile of large bubbles, you're not alone. The good news: once you understand the two-phase steaming method and have a proper frothing pitcher in hand, café-quality milk is well within reach.
In this guide we'll walk through the exact technique professional baristas use, explain why pitcher design matters more than most people realize, and show you why the Motta Europa Frothing Pitcher has become the go-to choice for both home enthusiasts and working baristas.
Why Most Home Frothing Goes Wrong
The most common mistakes beginners make are simple to fix:
- Starting with warm milk. Always use cold milk straight from the refrigerator. Cold milk gives you more working time during the aeration phase before it reaches temperature.
- Overfilling the pitcher. Milk expands significantly during steaming — never fill past the halfway point, or the pitcher can overflow and you'll lose control of the foam structure.
- Skipping the vortex. Aeration alone gives you large, dry bubbles. The second phase — creating a whirlpool motion — is what breaks those down into the silky microfoam you need for latte art.
- Going too hot. Milk sweetness peaks at around 140°F (60°C). Push past 158°F (70°C) and proteins denature, the foam structure collapses, and the milk develops a cooked, sulphurous off-taste.
The Two-Phase Steaming Method
Professional baristas think of milk steaming in two distinct phases. Master these and you'll have a repeatable result every time.
Phase 1: Aeration (Stretching the Milk)
Place the steam wand tip just below the milk surface — close enough to the top that you hear a soft, rhythmic tearing or hissing sound. This pulls air into the milk, creating thousands of tiny bubbles that form the base of your microfoam.
The volume of milk should rise by roughly 20–30% during this phase. For latte art, less is more here — stop stretching early and you'll get a glossy, pourable texture. Over-stretch and you'll get a dry, stiff foam that sits on top of the espresso rather than blending into it.
Phase 2: Heating and Vortexing
Once you've introduced enough air, submerge the wand tip slightly deeper and angle the pitcher to create a whirlpool motion. This spinning action folds the foam back into the liquid, breaking large bubbles into the micro-level texture that defines great microfoam.
Hold this until the pitcher reaches 140°F (60°C) — or, if you're not using a thermometer, until the metal becomes too hot to hold comfortably (around 3–5 seconds of discomfort is a reliable guide for most people).
After Steaming: Tap and Swirl
Before you pour, tap the pitcher firmly on the counter two or three times to pop any remaining surface bubbles, then swirl to keep the foam integrated and glossy. If your milk looks like wet paint — smooth, shiny, and with no visible bubbles — you've nailed it.
Why Pitcher Design Matters for Latte Art
Not all pitchers are created equal. The shape of the spout directly controls the flow of milk as it enters the cup, and that control is what separates a clean rosette from a muddy pour.
The key features to look for:
- Tapered spout with a pointed lip — focuses the milk stream for fine detail work
- Right capacity for the drink — too much headroom in a large pitcher makes it hard to control flow for a single shot
- Comfortable, ergonomic handle — latte art requires a steady, controlled tilt; a slippery or awkwardly placed handle costs you precision
- Stainless steel construction — conducts heat evenly, resists staining, and holds its shape after years of daily use
The Motta Europa Frothing Pitcher: Built for Precision
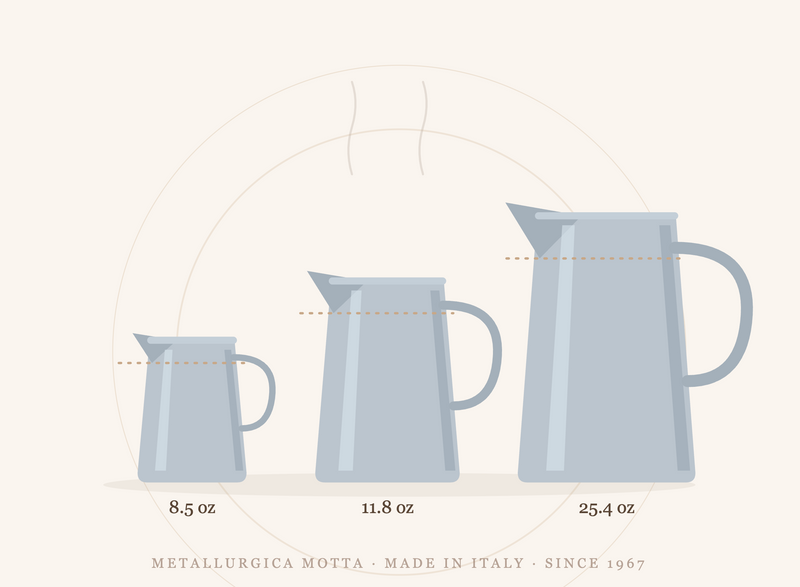
The Motta Europa Milk Frothing Pitcher (8.5 oz / 25 cl) was designed with exactly these principles in mind.
Manufactured in Italy by Metallurgica Motta — a company producing professional bar tools since 1967 — the Europa is made from 18/10 stainless steel: the same high-grade alloy used in professional commercial kitchens. The 18/10 designation refers to the chromium and nickel content, which gives the pitcher its corrosion resistance, polished finish, and long service life even under heavy daily use.
The Europa Spout
The pitcher's defining feature is its Europa spout — a carefully engineered tip that produces a controlled, focused stream of milk. This is what allows baristas to place microfoam exactly where they want it in the cup, whether they're pulling a simple heart, a layered tulip, or a detailed rosette. The precision of the pour is a direct function of spout geometry, and the Europa delivers.
8.5 oz: The Ideal Size for Single Drinks
At 25 cl (8.5 oz), the Europa hits the sweet spot for single-espresso beverages:
Smaller pitchers give you better tactile feedback during pouring — you can feel the milk moving and adjust your angle in real time. This is why competition baristas often prefer a compact pitcher for detail work over a larger vessel.
Ergonomic Handle
The Europa's handle is positioned to keep your grip steady through the full arc of a latte art pour — from the initial drop that sinks through the espresso crema, through the rocking motion that builds the pattern, to the cut-through that finishes the design.
Step-by-Step: Frothing with the Motta Europa
1. Fill the pitcher to just below the halfway mark with cold whole milk (whole milk produces the most stable microfoam; 2% works too; oat milk behaves differently but is manageable with practice).
2. Purge the steam wand for 1 second to clear any condensation.
3. Position the wand tip just below the milk surface at a slight angle toward the wall of the pitcher.
4. Open the steam valve fully and begin Phase 1 — aeration. Listen for the gentle tearing sound. Stop when the milk has risen about 25%.
5. Deepen the wand tip slightly and angle the pitcher to start the vortex — Phase 2. The milk surface should spin smoothly.
6. Stop at 140°F (60°C), or when the pitcher is too hot to hold.
7. Tap and swirl. The milk should look glossy and smooth — no visible bubbles.
8. Pour immediately. Textured milk begins to separate within 20–30 seconds, so move quickly.
Choosing the Right Milk
Frequently Asked Questions
How full should I fill my frothing pitcher? Never more than halfway. Milk expands as you steam it, and you need headroom to control the vortex.
What temperature should frothed milk be? 140°F (60°C) is ideal. This is when lactose tastes its sweetest. Above 158°F (70°C), milk scorches and the foam structure breaks down.
Can I use the Motta Europa with any espresso machine? Yes. The pitcher works with any home or commercial espresso machine equipped with a steam wand. Its compact 8.5 oz size suits most countertop machines perfectly.
Why does my foam separate before I can pour? Separation happens when foam isn't properly integrated during the vortex phase, or when you wait too long before pouring. Tap, swirl, and pour within 20–30 seconds of finishing steaming.
What's the difference between frothing and steaming? Frothing creates a large volume of airy foam (think cold-milk frothers). Steaming — using a steam wand — produces microfoam: velvety, fine-textured milk that integrates with espresso. Microfoam is what you need for latte art and café-quality drinks.
The Bottom Line
Frothing milk like a barista comes down to three things: cold milk, the two-phase technique (aerate, then vortex), and stopping at the right temperature. Once you've got the technique, the pitcher you use determines how precisely you can pour — and that's where the Motta Europa earns its reputation.
Sixty years of Italian manufacturing, 18/10 stainless steel, and a spout engineered for control: it's the tool professional baristas reach for, and the one that will take your home espresso from passable to genuinely impressive.
Shop the Motta Europa Frothing Pitcher →
Metallurgica Motta has been crafting professional bar and barista tools in Italy since 1967. Explore the full range of frothing pitchers and barista tools at Motta-USA.


Leave a comment